
Look of The Week
Before I launch into this Look of the Week I want to apologise for not posting anything in so long. I never got a chance to do a Look of the Week last week because I have been up to my eyes with my thesis which is due very, very soon! I am back now though, and I promise this Look of the Week will make up for missing last week.
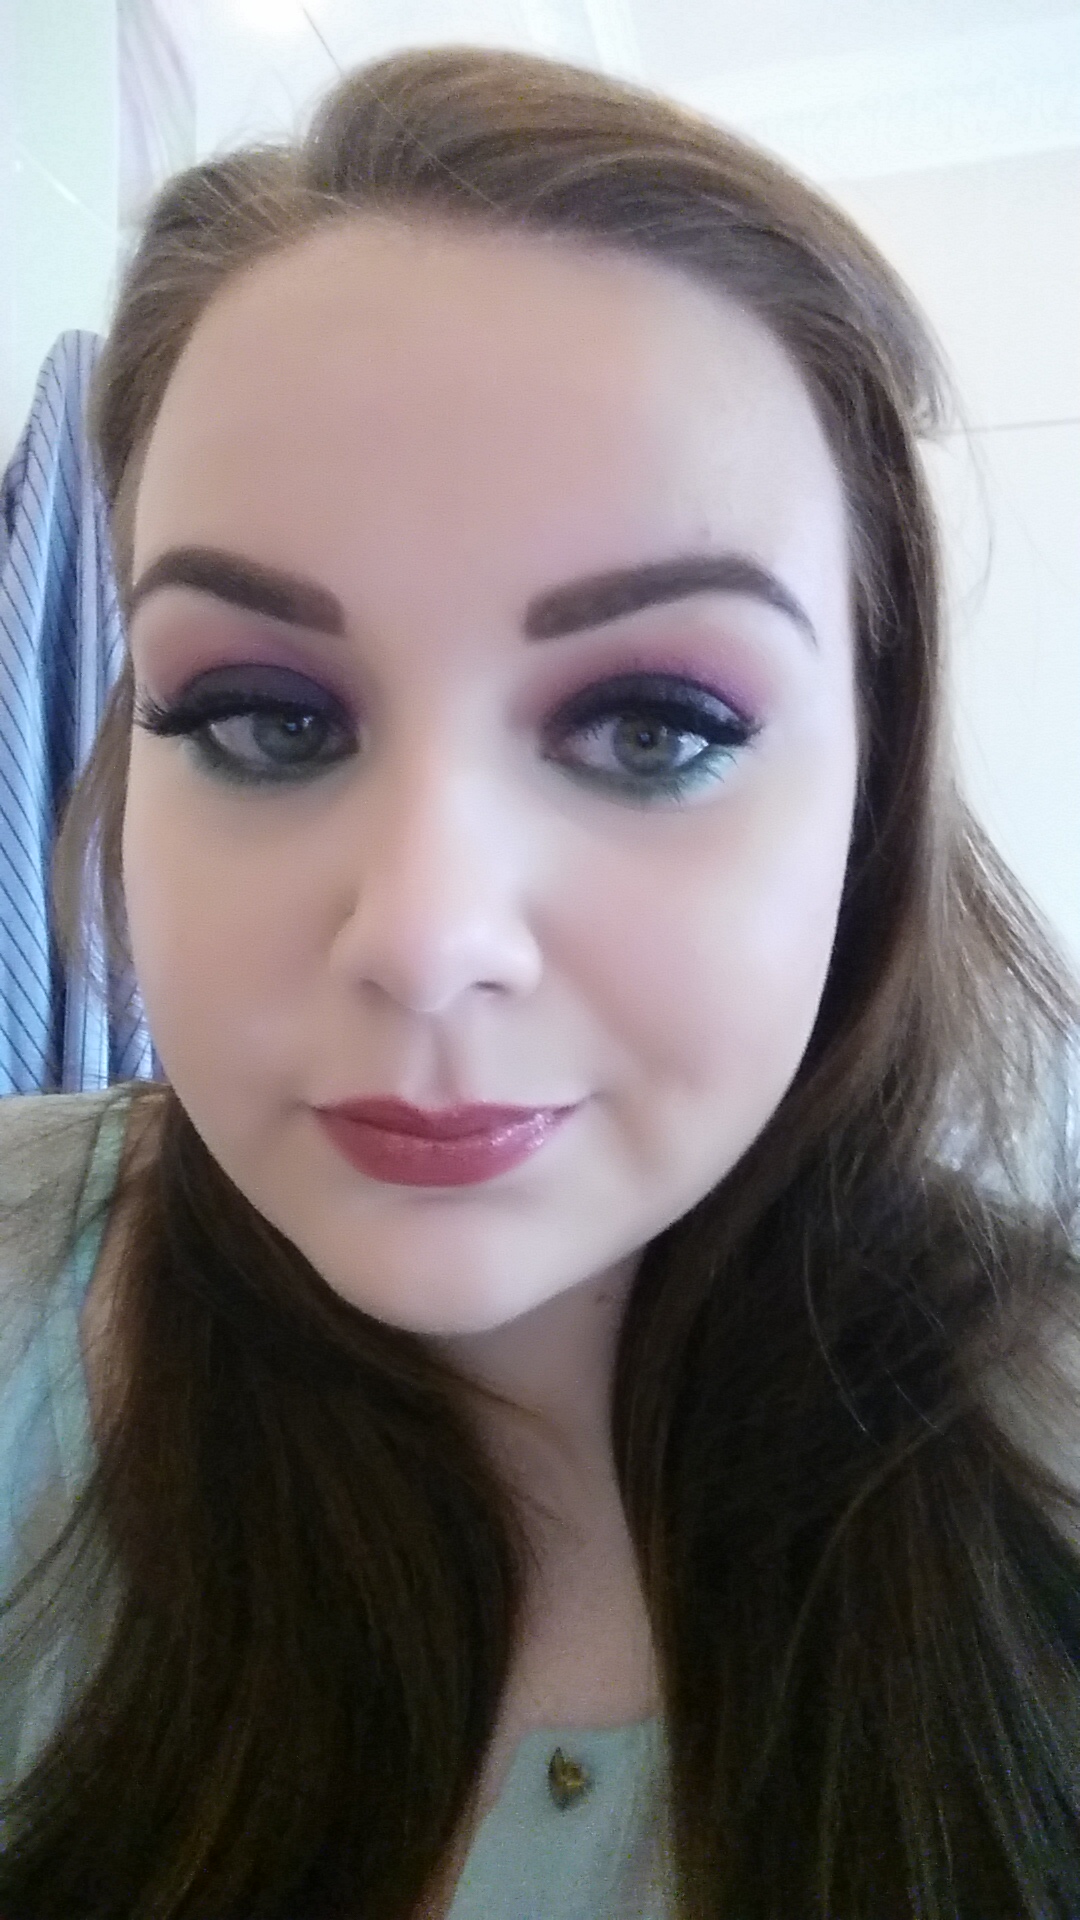
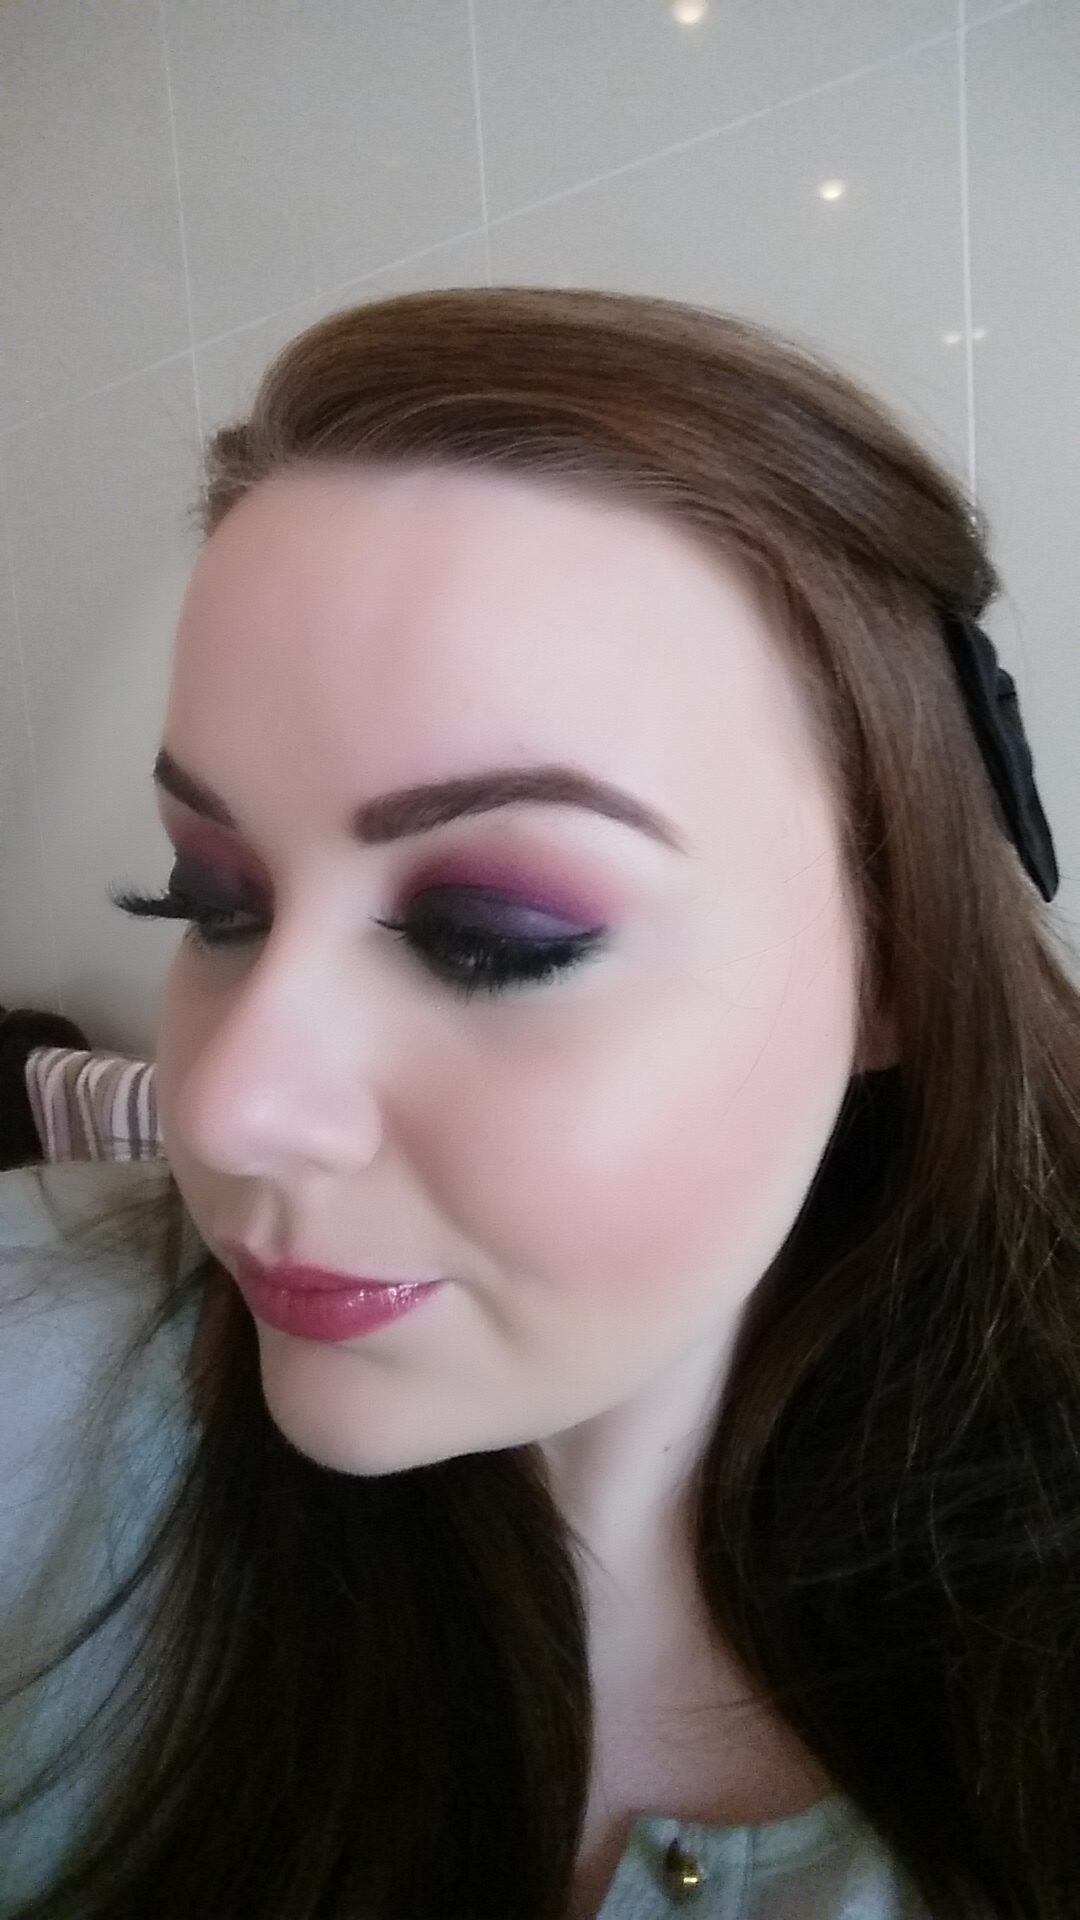
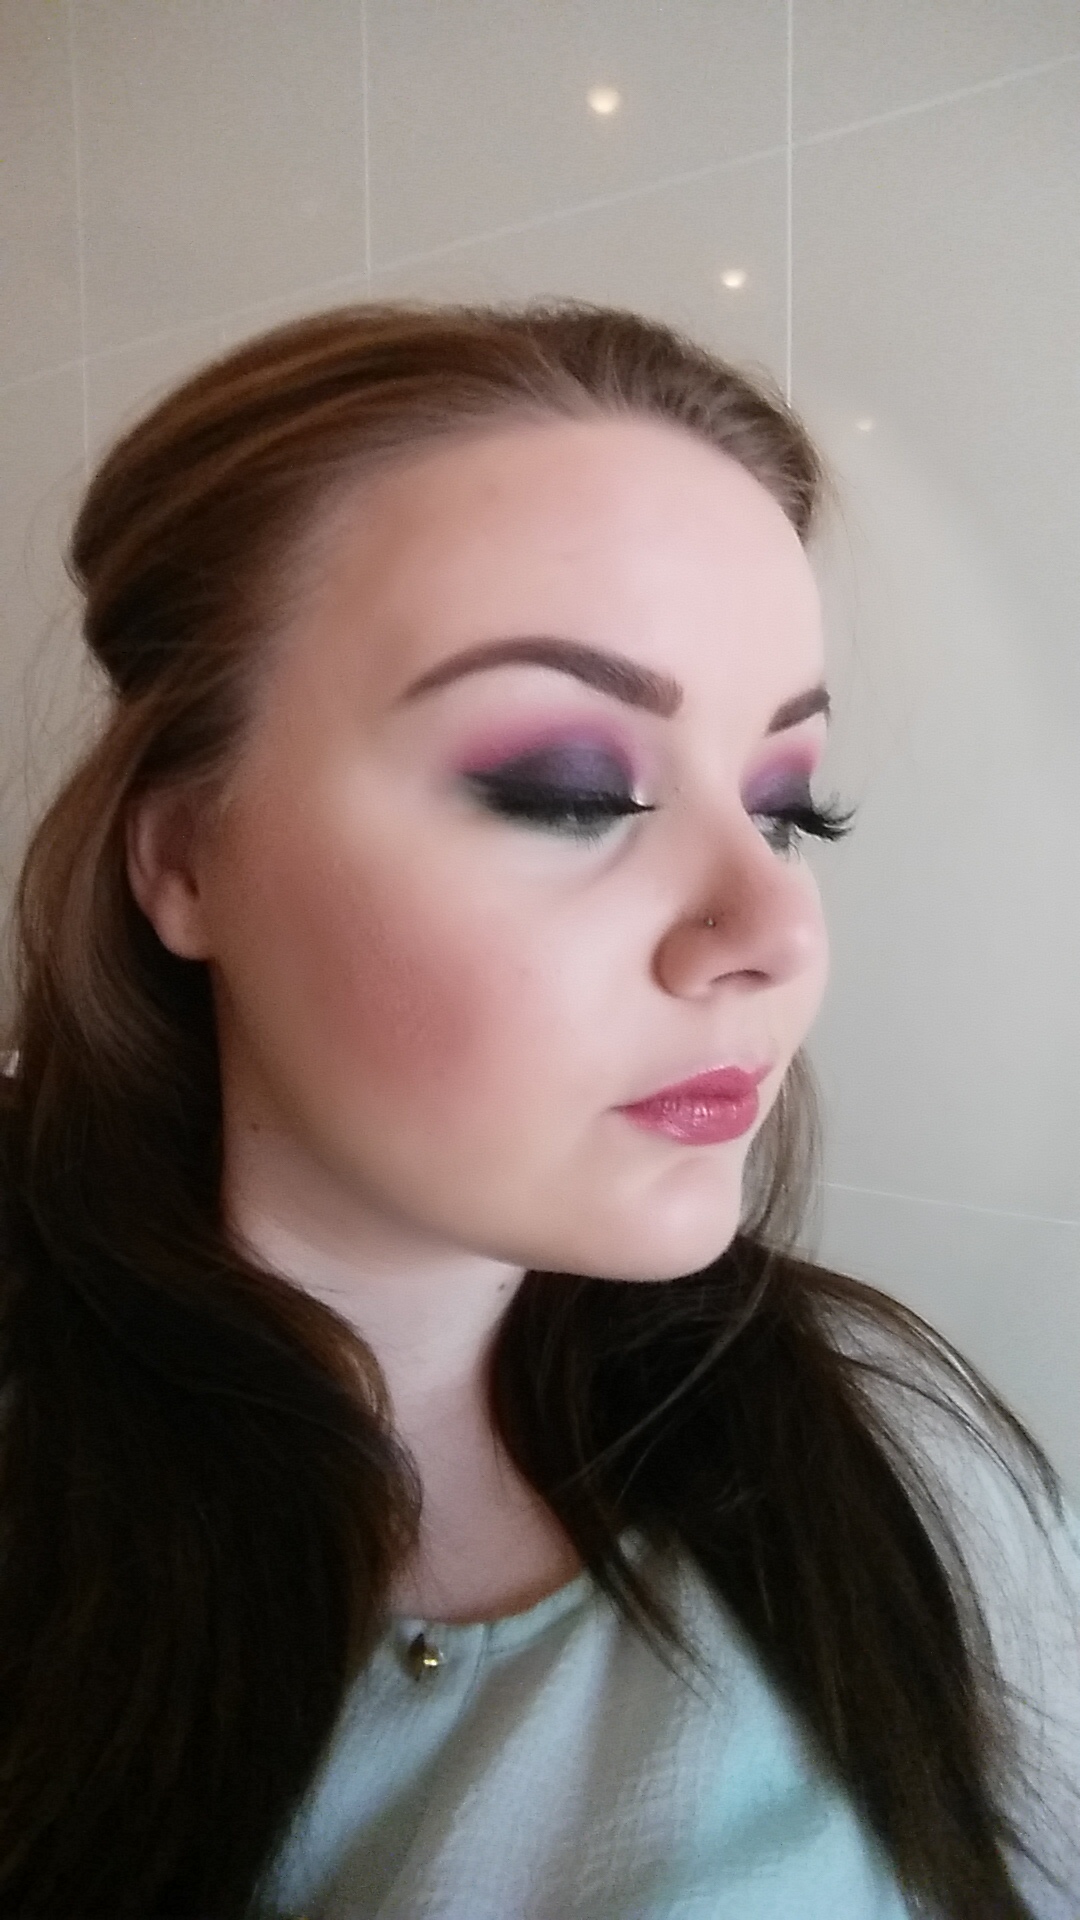
This week is all about colour. My idol, Jaclyn Hill, did a Youtube video of this look a few week’s ago and I just fell in love with it so I had to try my own version of it. I hope I did it justice! This look is an extremely colorful smokey eye and it is very out there – in other words this is not a look for the office, but definitely a look for a great night out! I had a lot of fun creating it, so I hope you enjoy it.
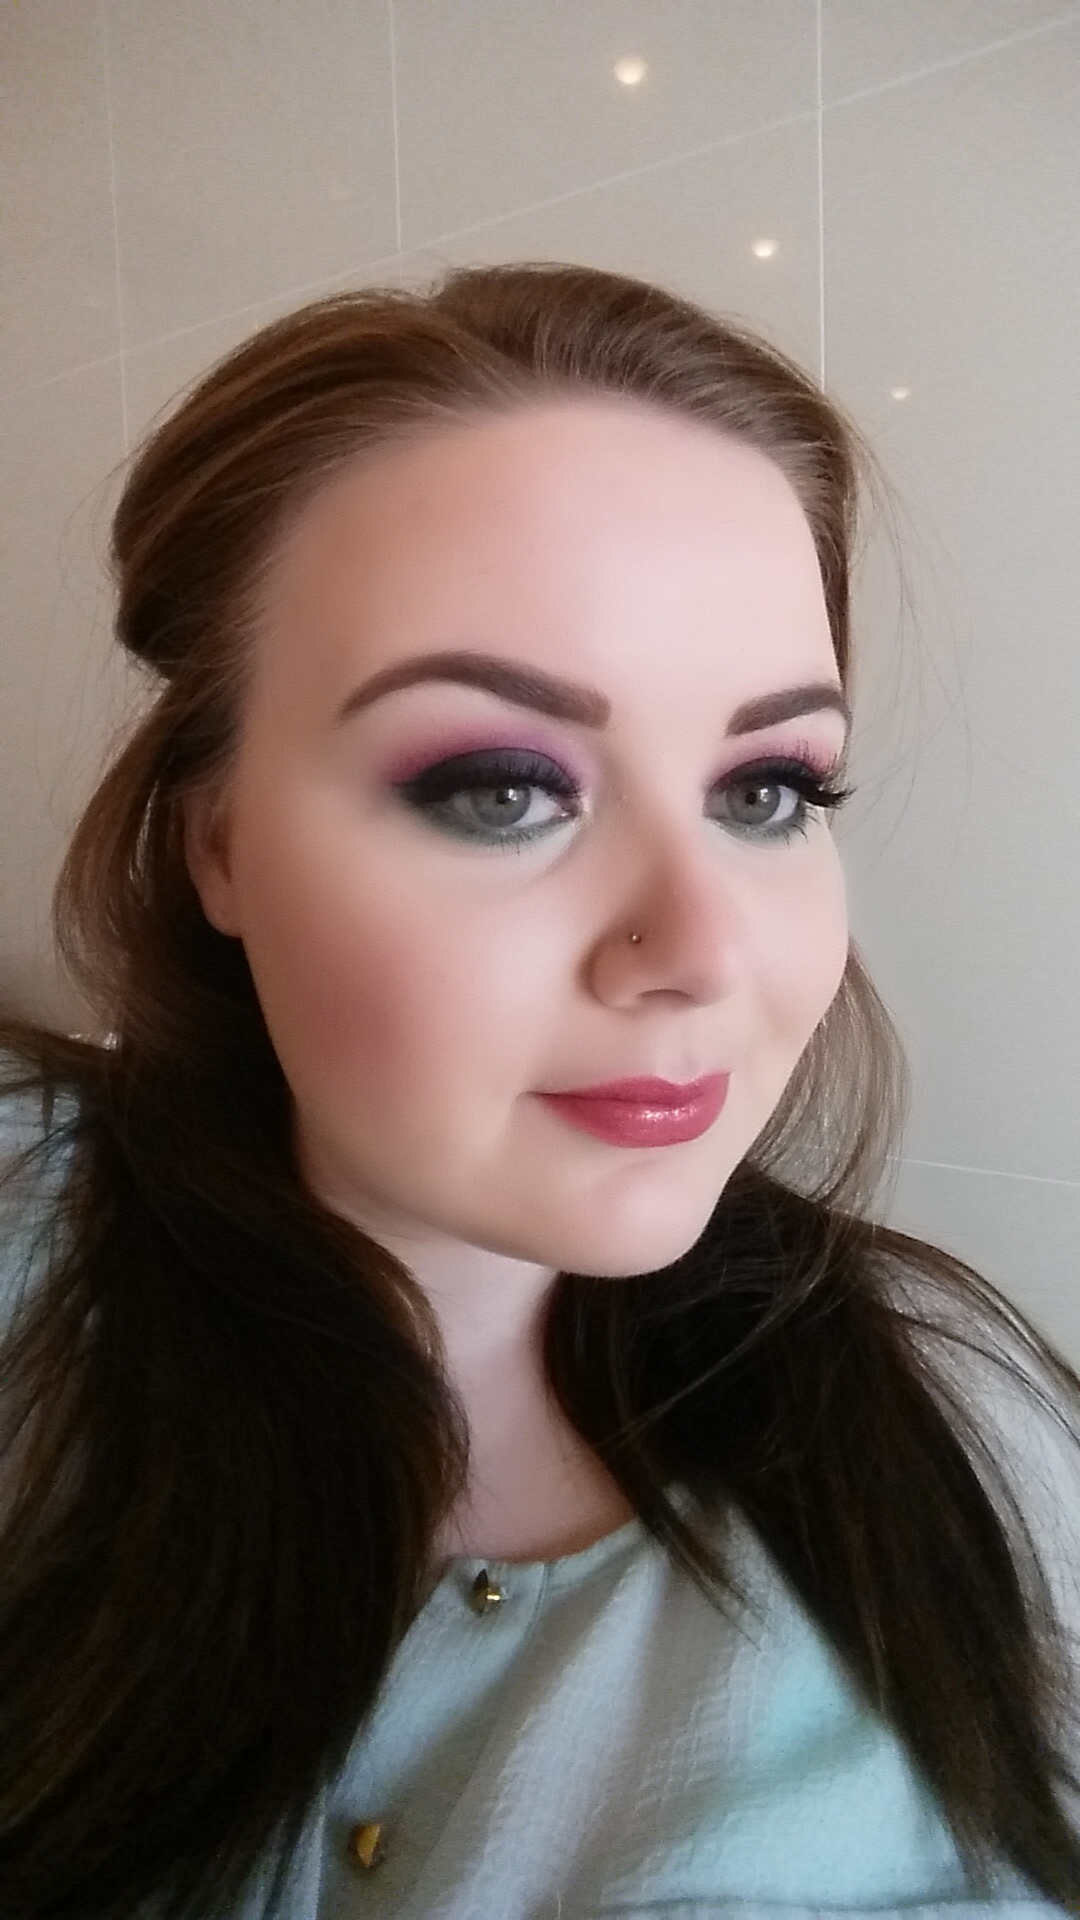
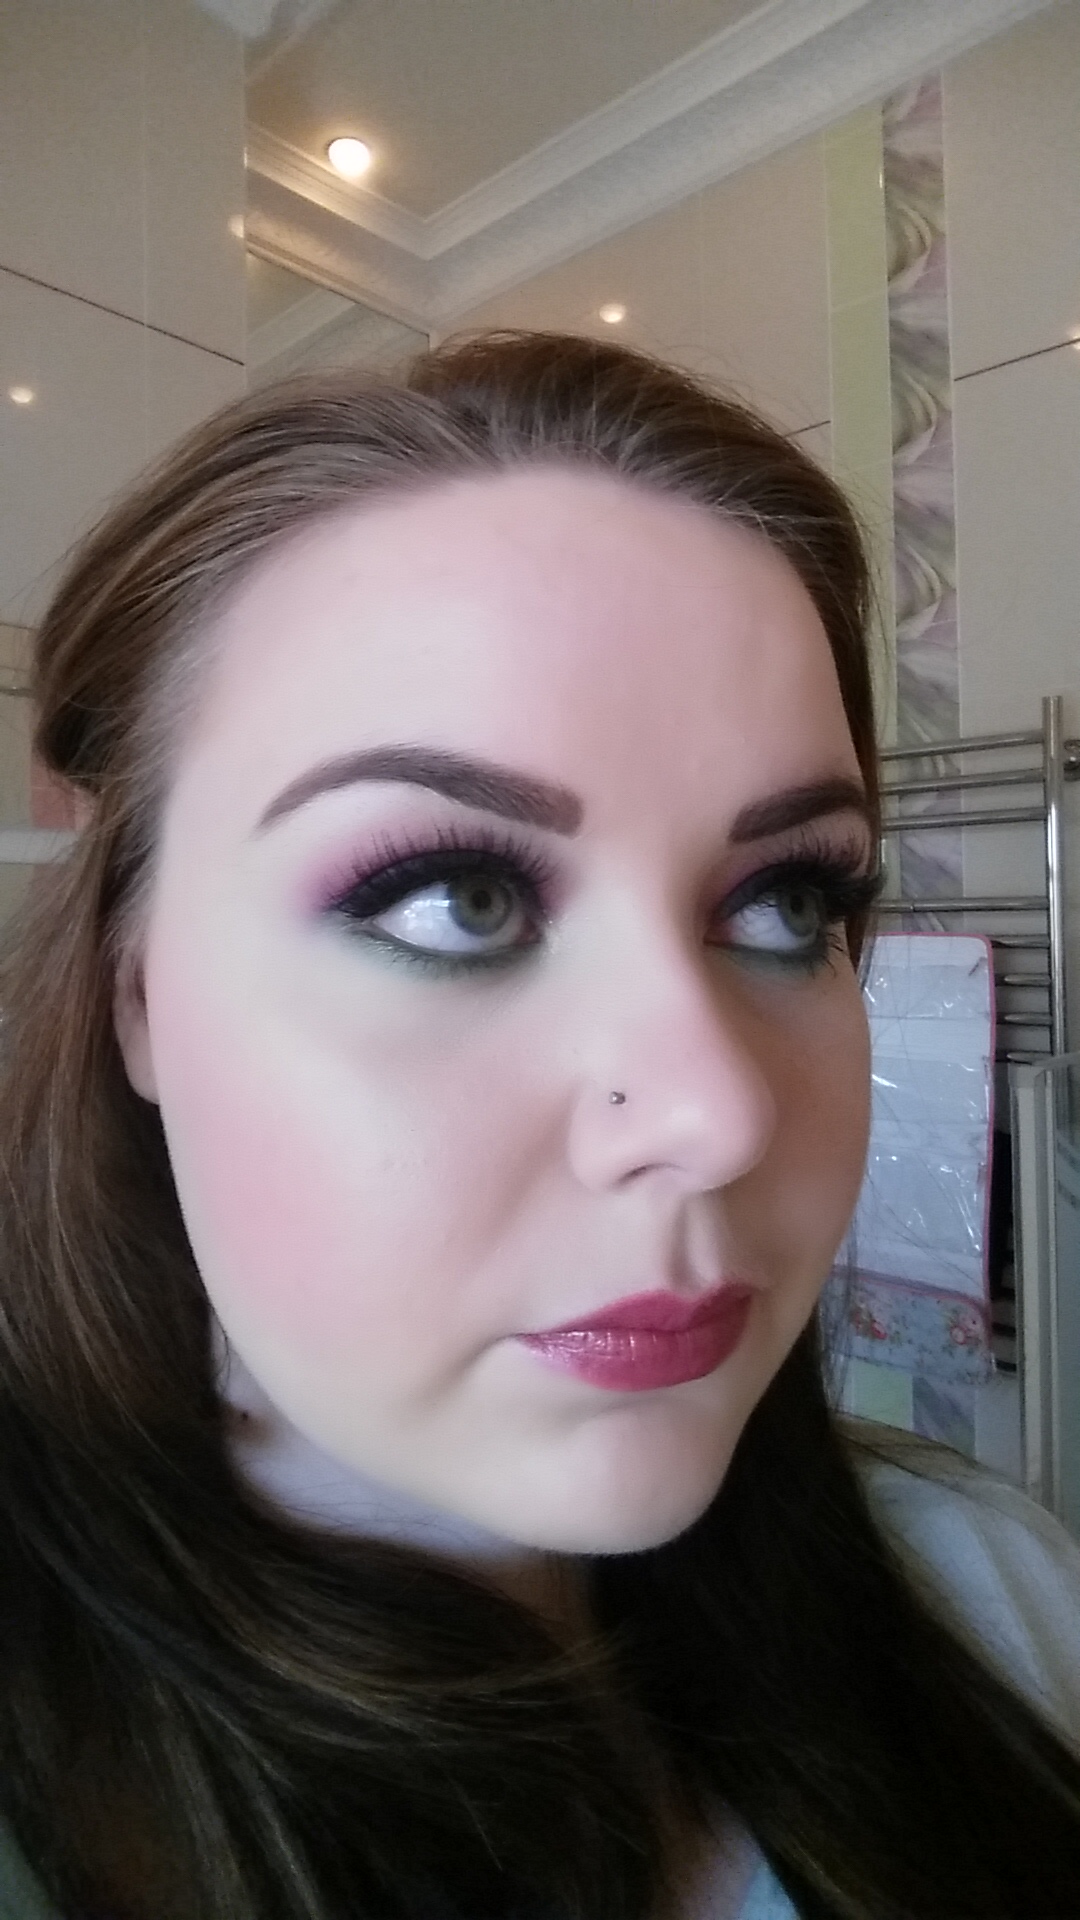
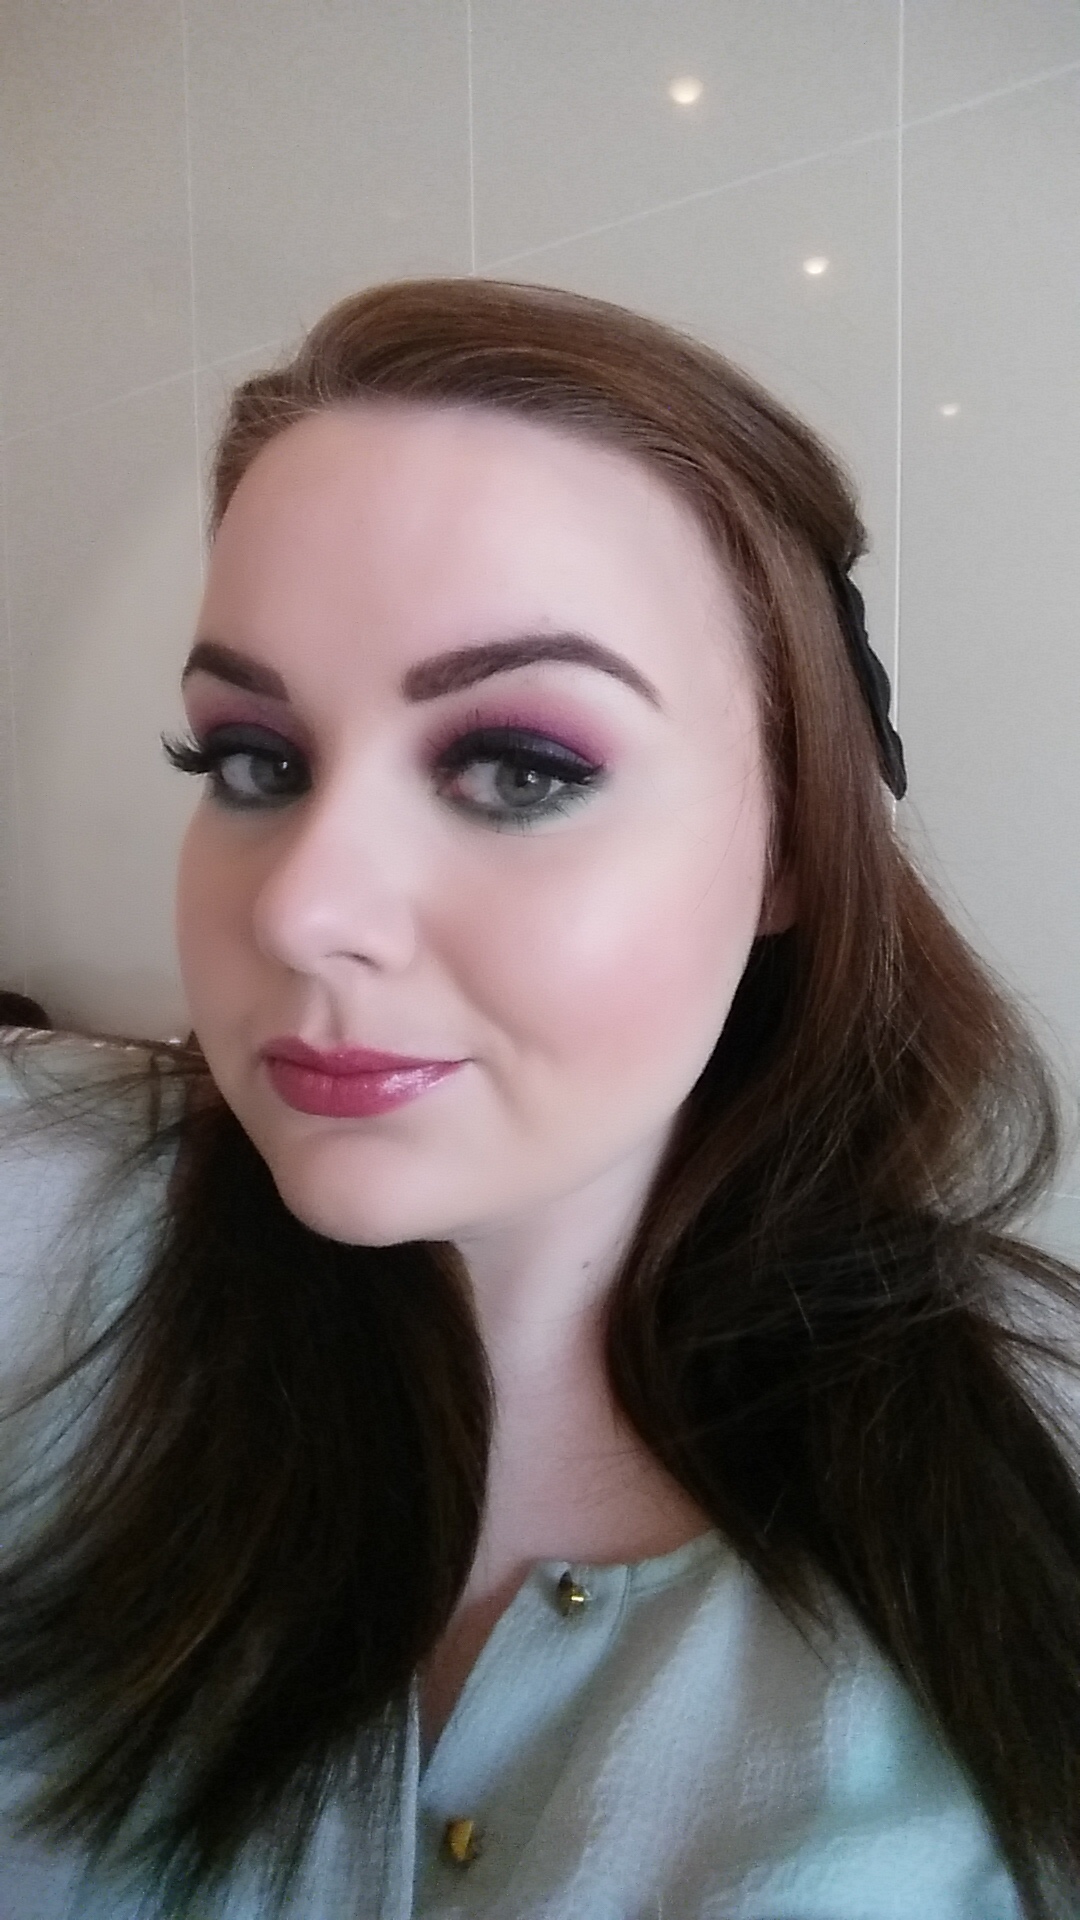
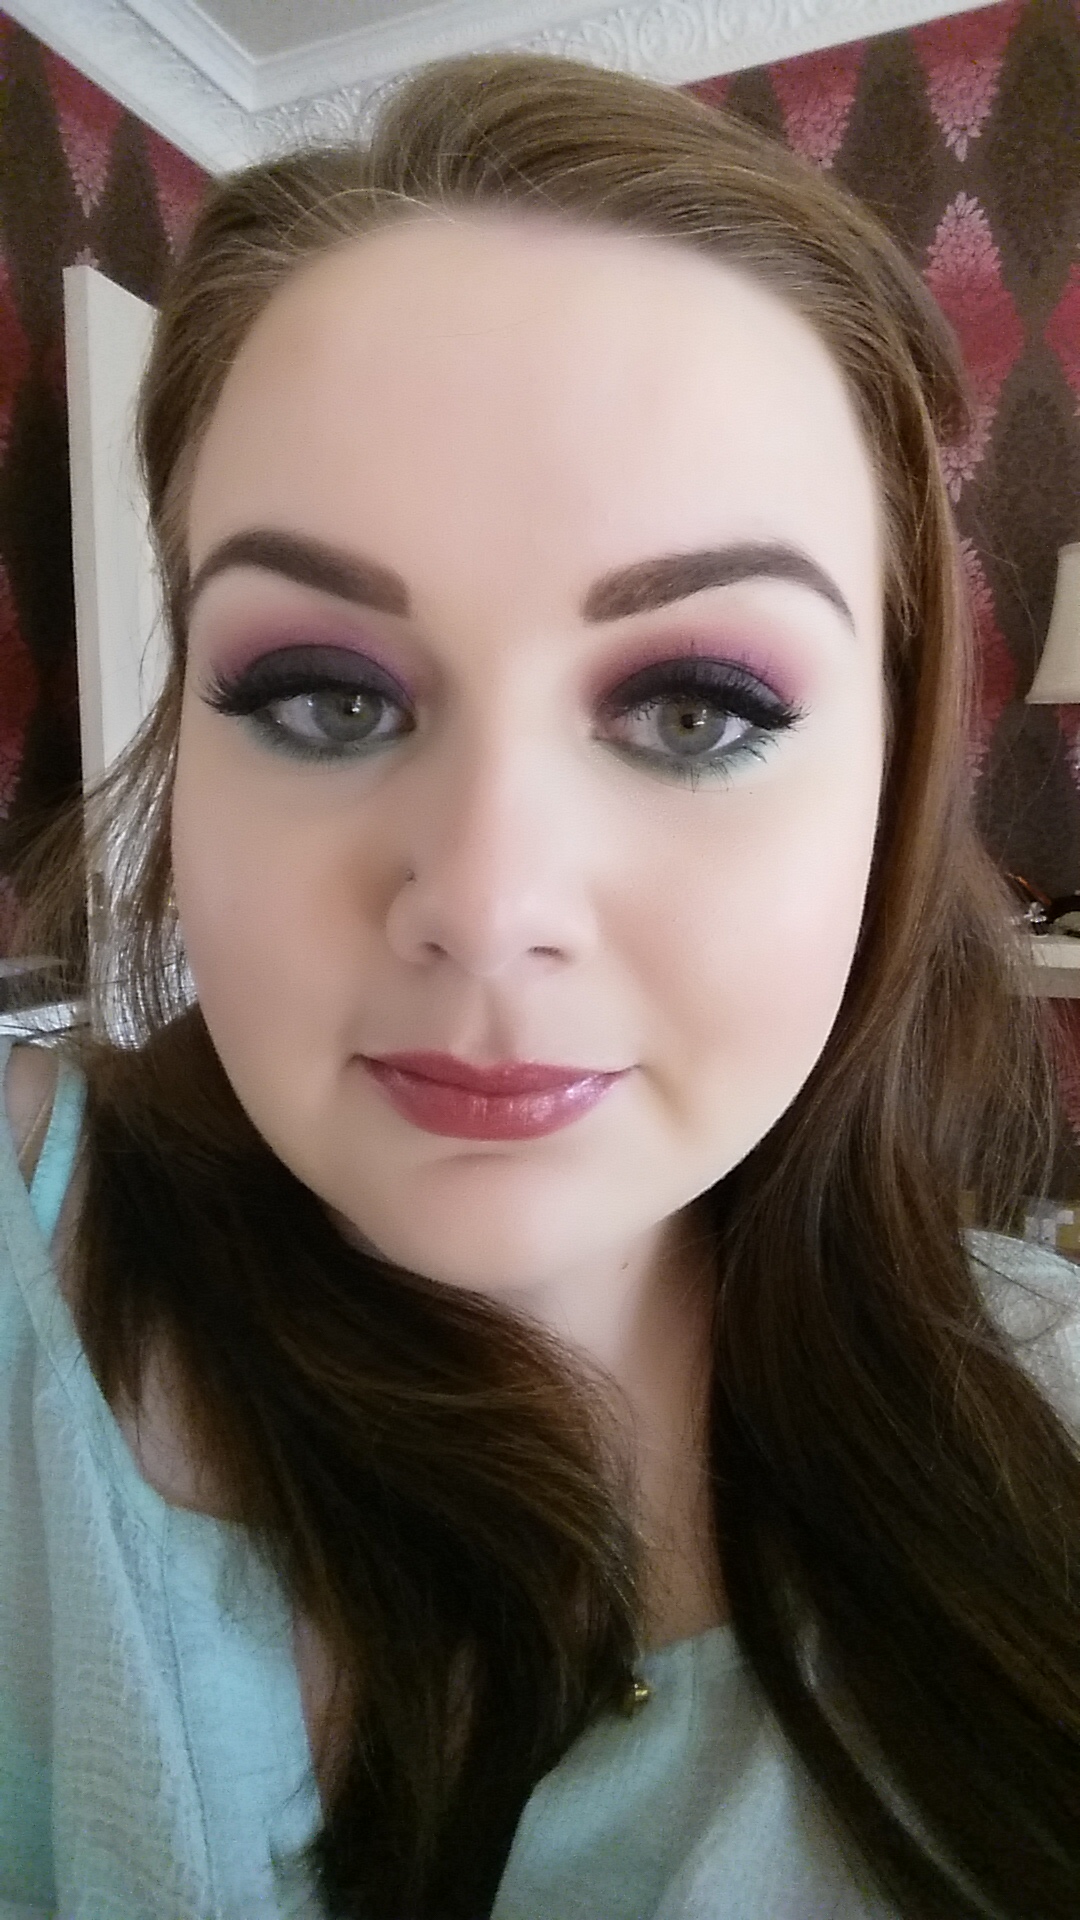
As always, start with a prepped and primed base. When using bright eye colours it is really important to prime the lid so that nothing creases or runs away. I applied primer and I applied my concealer to the lid to make sure I had a good base. I then applied my transition shade very liberally all over the upper crease area. Transitioning is very important for this look so it will take a few shades and a lot of blending! After the transition shade I went in with a light orange shade, I applied this all over the crease area again. I then took a very deep plum/purple shade and applied this all over the lid. This shade can go up to the crease but not past it. Make sure you blend it into the crease well, I created a very subtle flick on the outer corner. Next step is the fun step, I took a very vibrant pink/purple colour, Jilted from the Electric palette to be exact, and packed this into the crease. This needs to be very specific and tight in the crease and then blended up and out. The smokey purple needs to blend outward seamlessly into the pink colour. Don’t forget to blend after every application of colour. I noticed that every time I blended I smudged away some of the purple so if that happens just reapply it, this will help make the colour look bolder. Adding the pink shadow can be a bit intimidating, it is very pigmented but the rule with this look is go big or go home! The bolder the better. The transition from purple, to pink, to orange on the upper lid is so pretty and so fun.
When the upper lid is done move on to the face. With so many colours on the lid area, under your eyes will definitely need to be tidied up with some eye cream and cotton buds. Having done this I applied my concealer to the under eye area. With so much happening on the eyelids, the area around them needs to be bright and clean looking, it makes the colours pop even more! Next I applied my foundation using a stippling brush for that flawless look. Setting powder is really important if you’re going out on the town, it will hold everything in place and correct any shininess you may be prone to. I applied the powder all over my face, and under my eyes to set the concealer. Next I did some contouring and highlighting. I used a very light bornzer shade to create a contour across my forehead and down my cheekbones. Blending is vital when contouring. I then applied a very pale pink/peach blusher, and then applied some shimmer highlighter to my cheekbones, forehead, cupids bow, and the bridge of my nose.
Moving back to the eyes, you now get to add even more colour! Take a bright green shadow and boldly line that lower lash line. The thicker the line the better, you want to show off this colour and balance out the upper lid. The green is just stunning with the purple and pink of the lid but I think a bright blue would also do wonders for this look. Don’t forget to blend that line out so that it looks smokey. I like to add a pop of white shimmer shadow to the inner corners of my eyes when I do very smokey eyes, it opens up the eye area.
Next step is eyebrows. I am always yapping about the importance of well structured brows so I won’t go through it again; have a look at my brow post for tips. An application of mascara and/or lashes and you’re almost there!
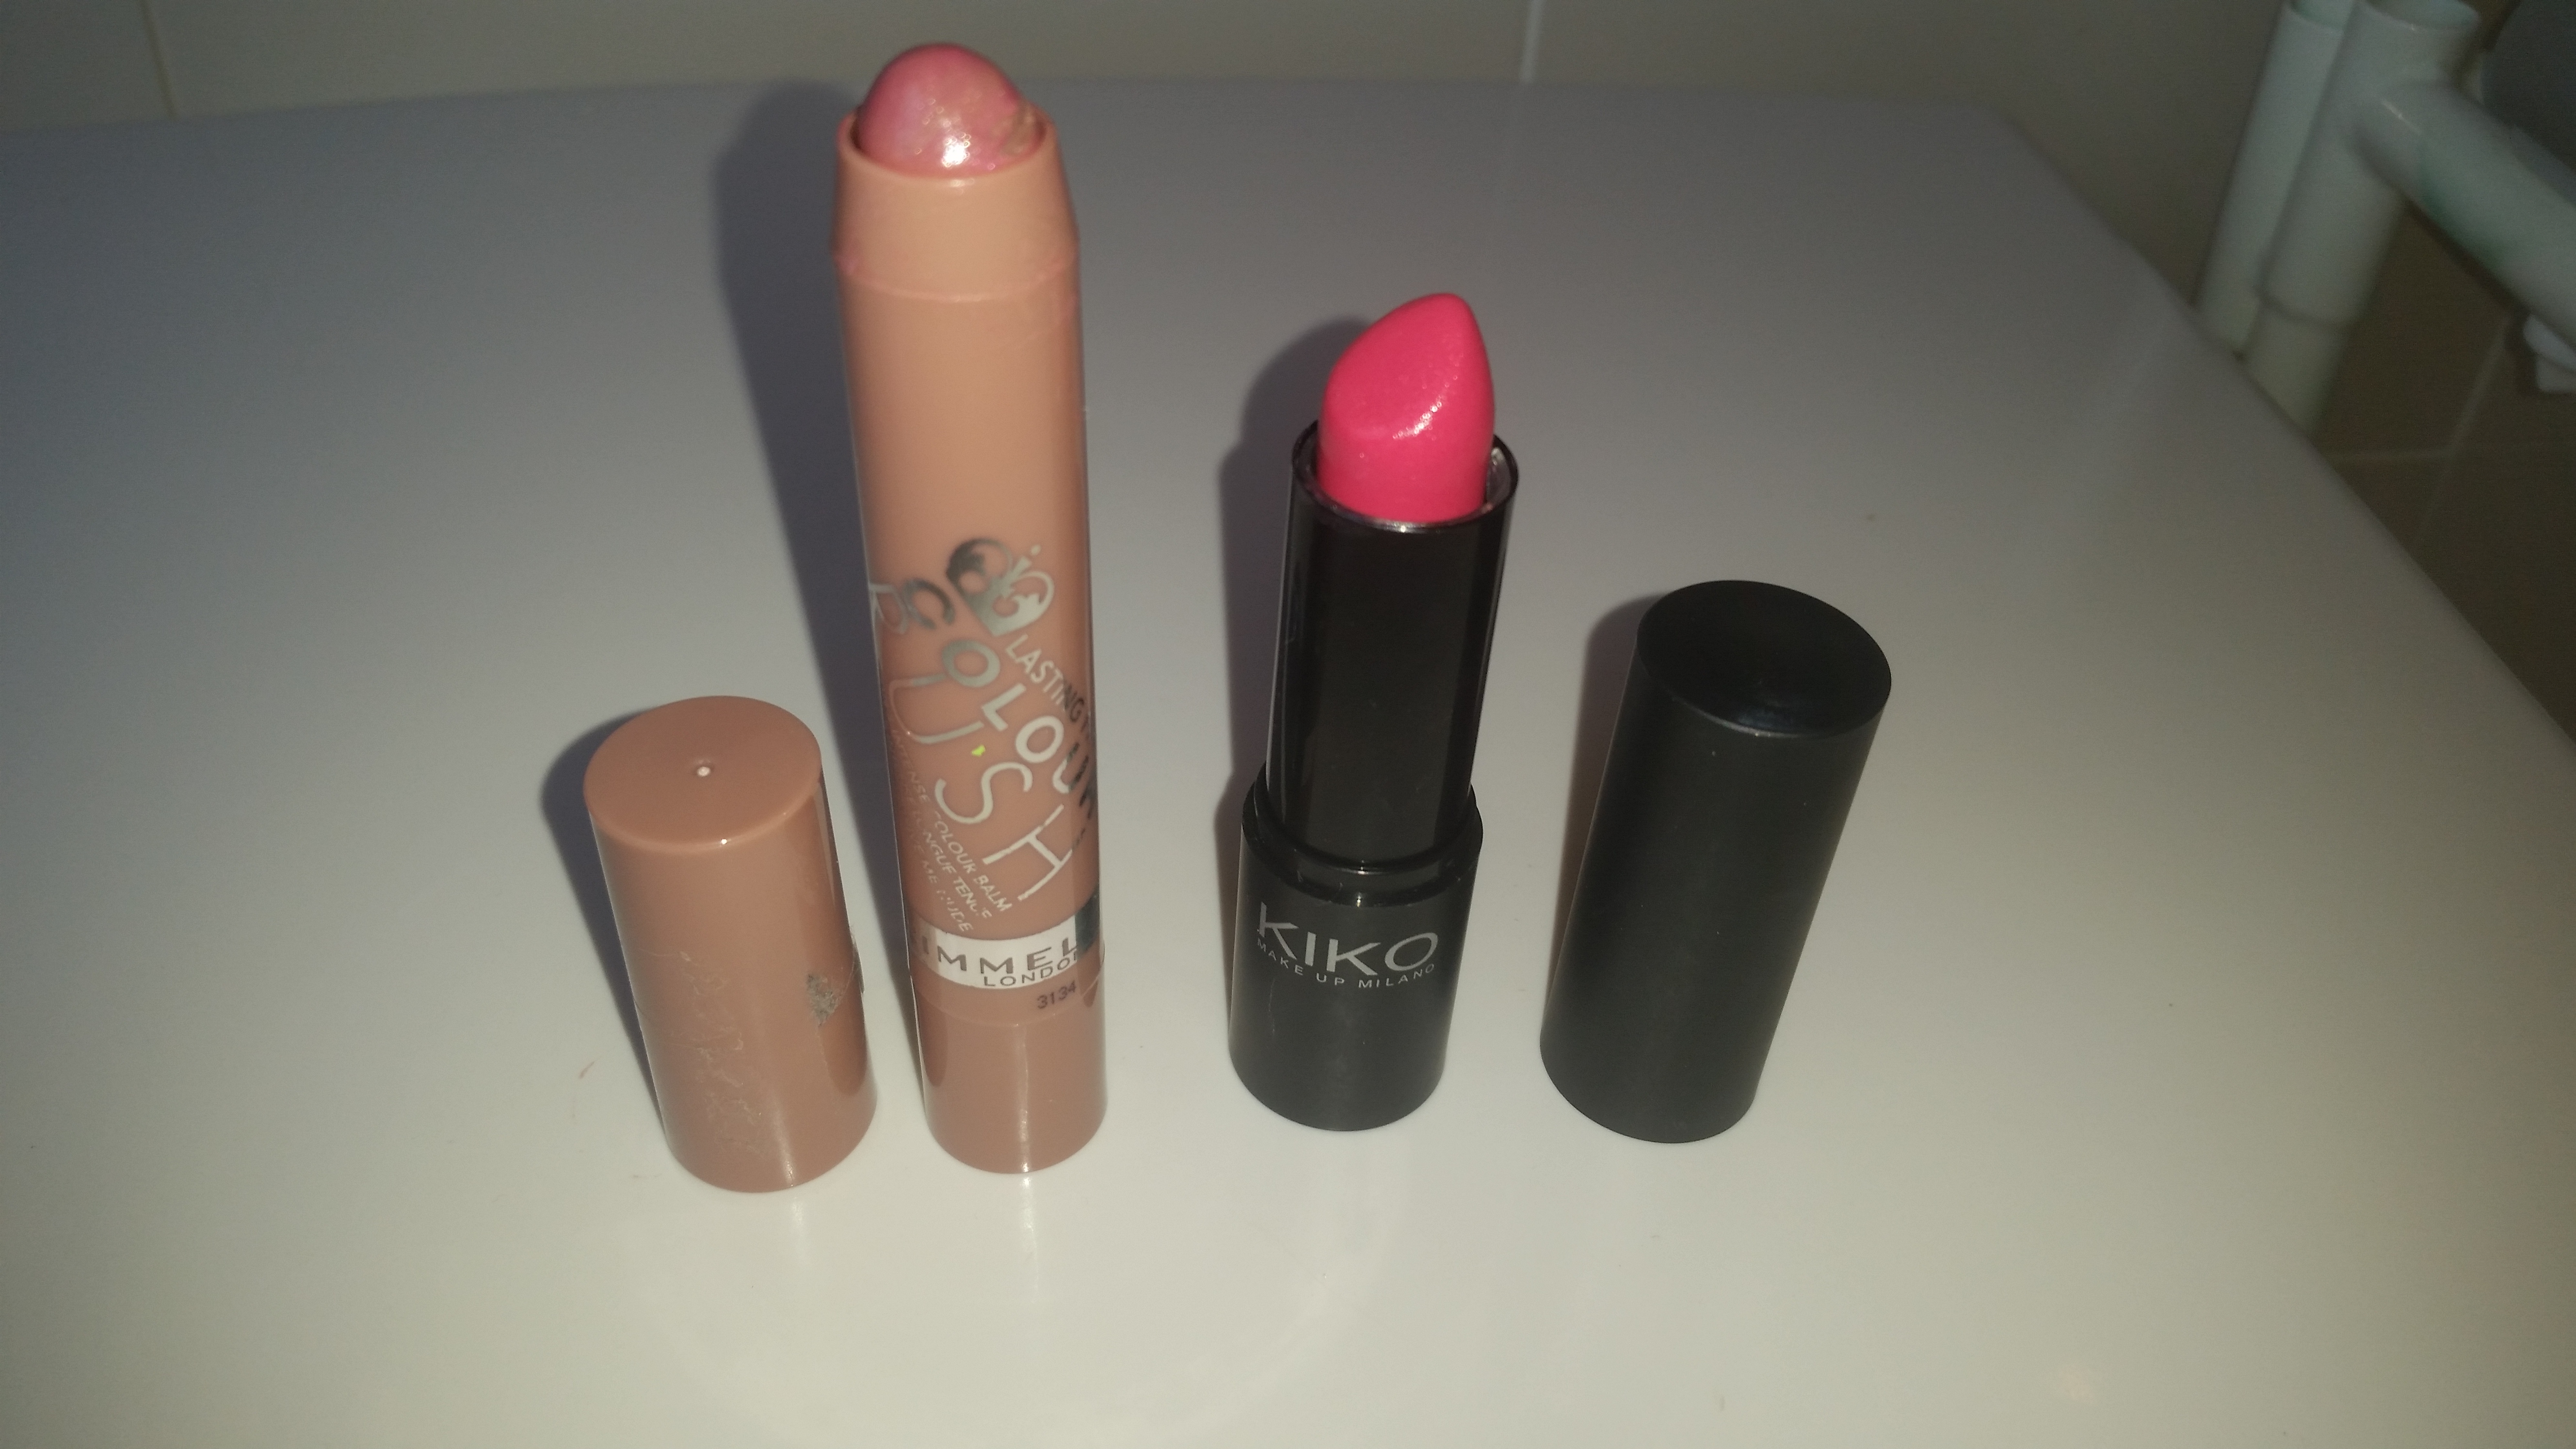
On my lips I am wearing a pink Kiko lipstick toned down with a nude lip crayon to create a very soft pink colour to compliment the colorful eyes.
And you’re done. With so many different colours there are a number of steps but I have to say this is a fun look to create. Just remember to keep your outfit neutral and let your makeup do all the work!


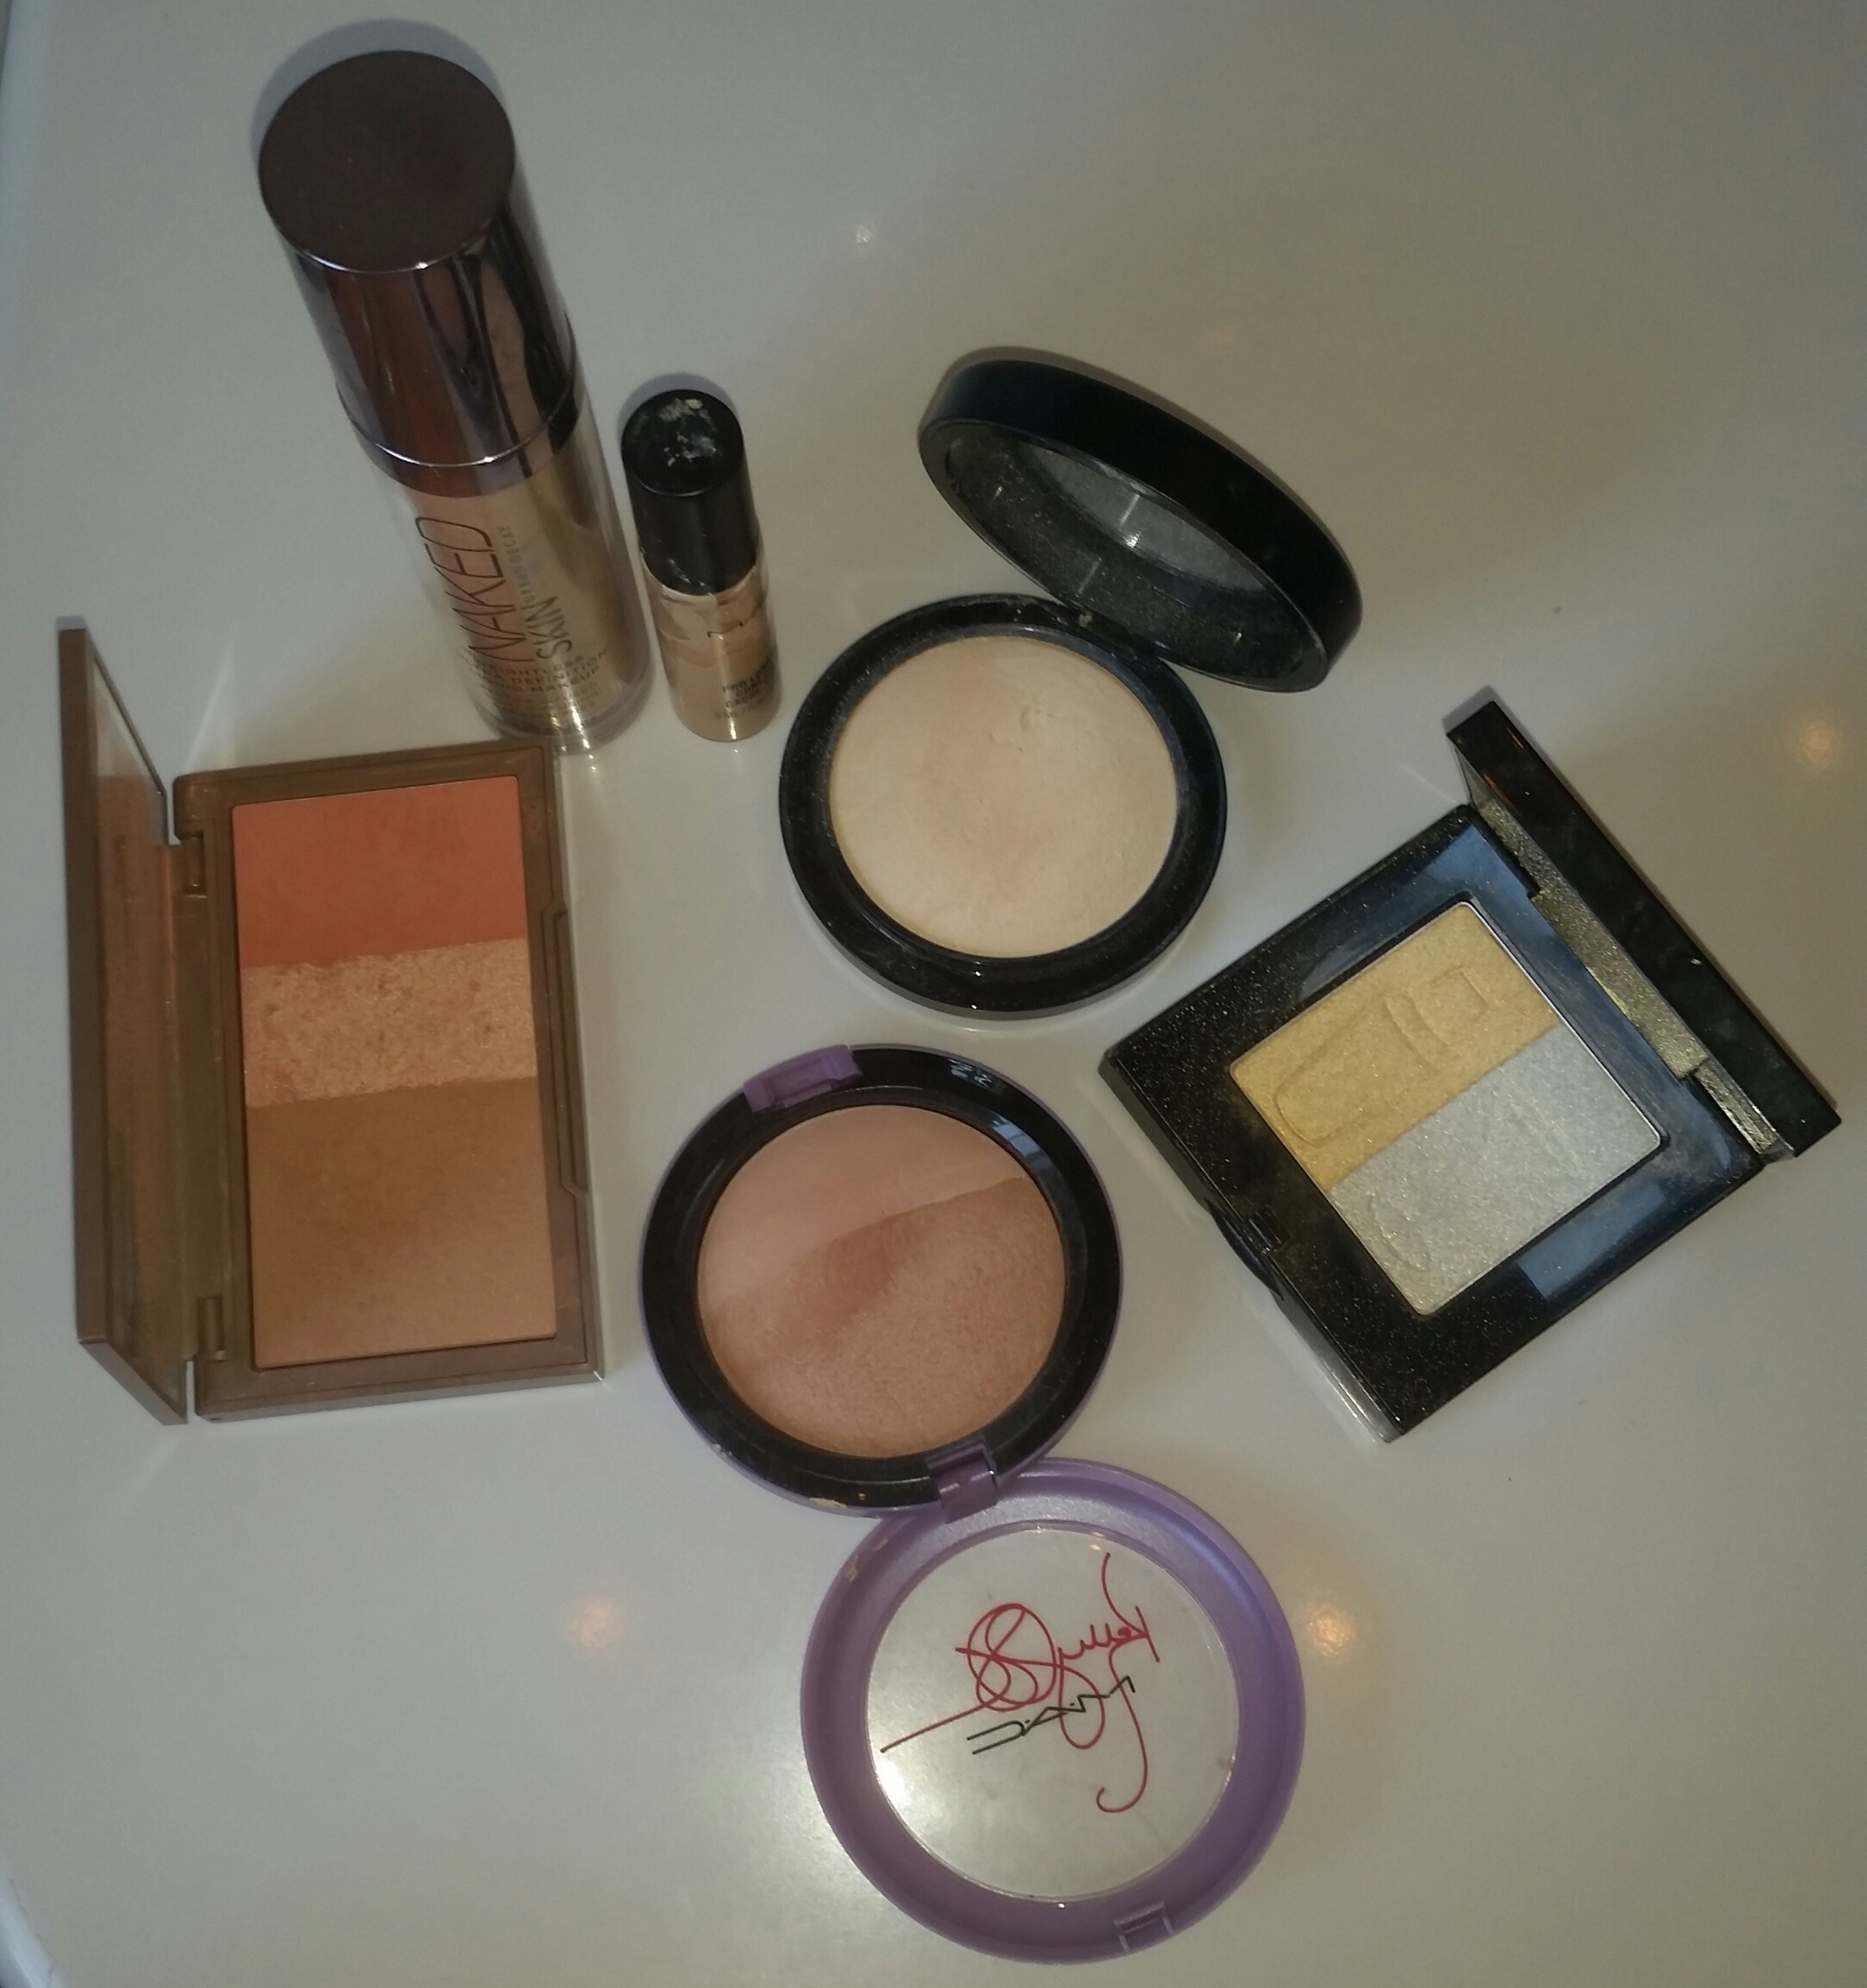
Product List:
Foundation: Urban Decay – Naked Skin in 2.0
Concealer: MAC – Pro Long Wear in NC15
Setting powder: MAC – Mineralize skin finish in Light Plus
Blusher: Urban Decay – Naked Flushed in Streak
Contour: MAC – Mineralize Skin Finish Kelly Osbourne compact
Highlighter: Bobbi Brown – Party Shimmer Brick
Eyes: Transition – Urban Decay – ABC Gum
Crease – Bobbi Brown – Brights eye palette, shade Sherbert
– Urban Decay – Electric palette, shade Jilted
Lid – Revlon Custom eyes – Rich Temptations
Lower lash line – Smashbox – Santigold Earth As We Know It palette, green shade
Inner corner – Smashbox – Santigold Earth As We Know It palette, White shade
Mascare: Smashbox – Full Exposure
Lipstick: Kiko – shade 911
Rimmel – nude lip crayon


Hello

