Look of The Week
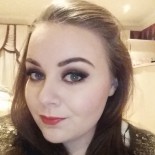
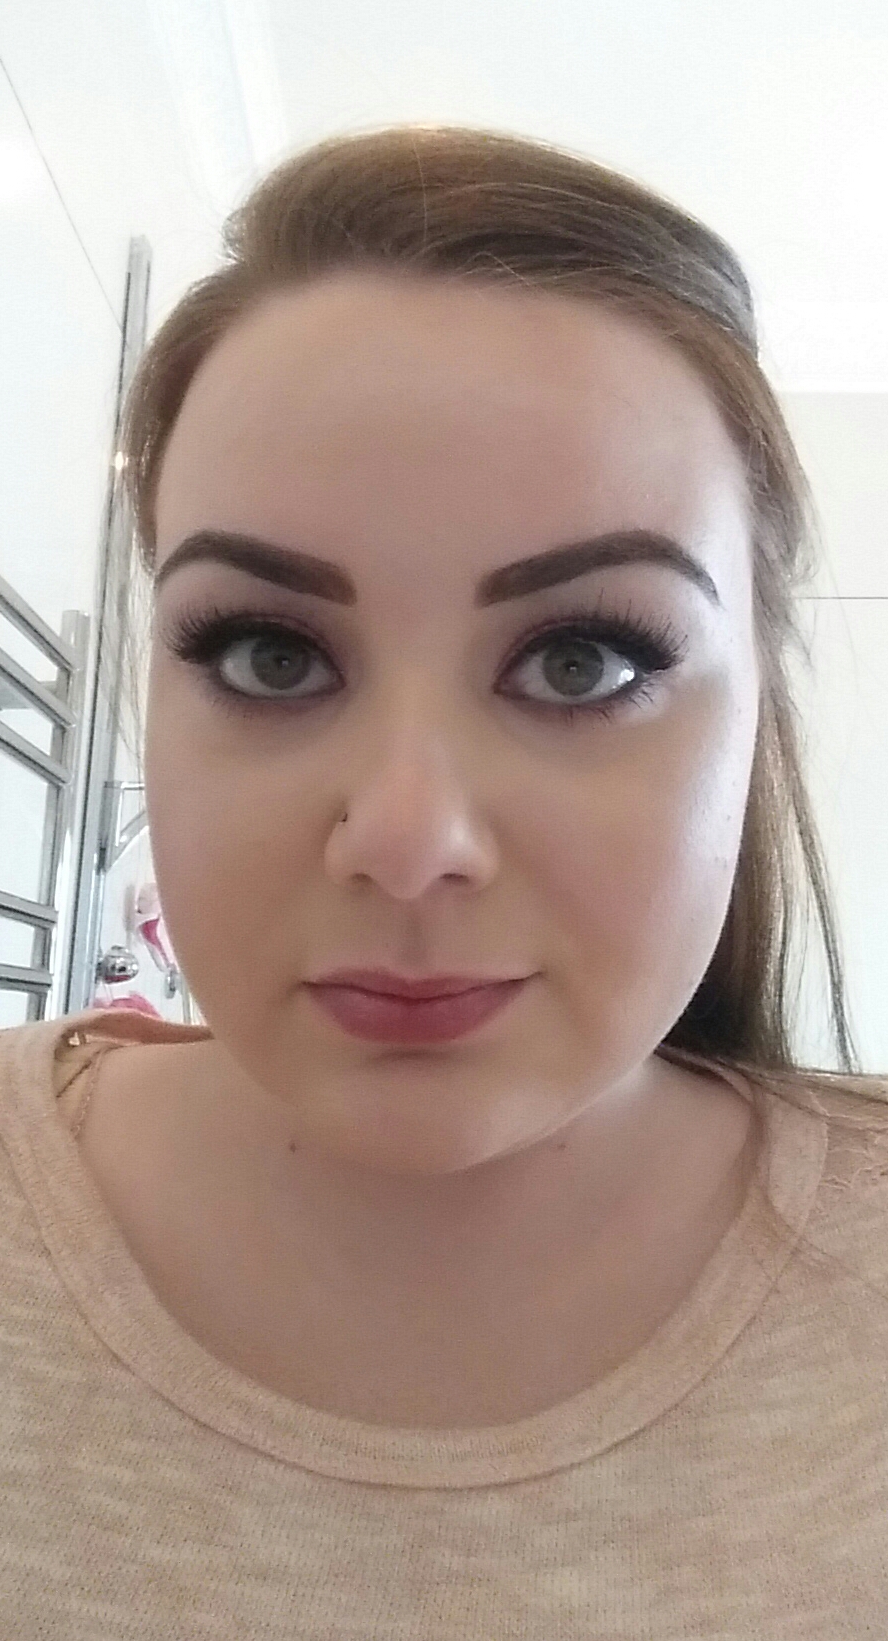
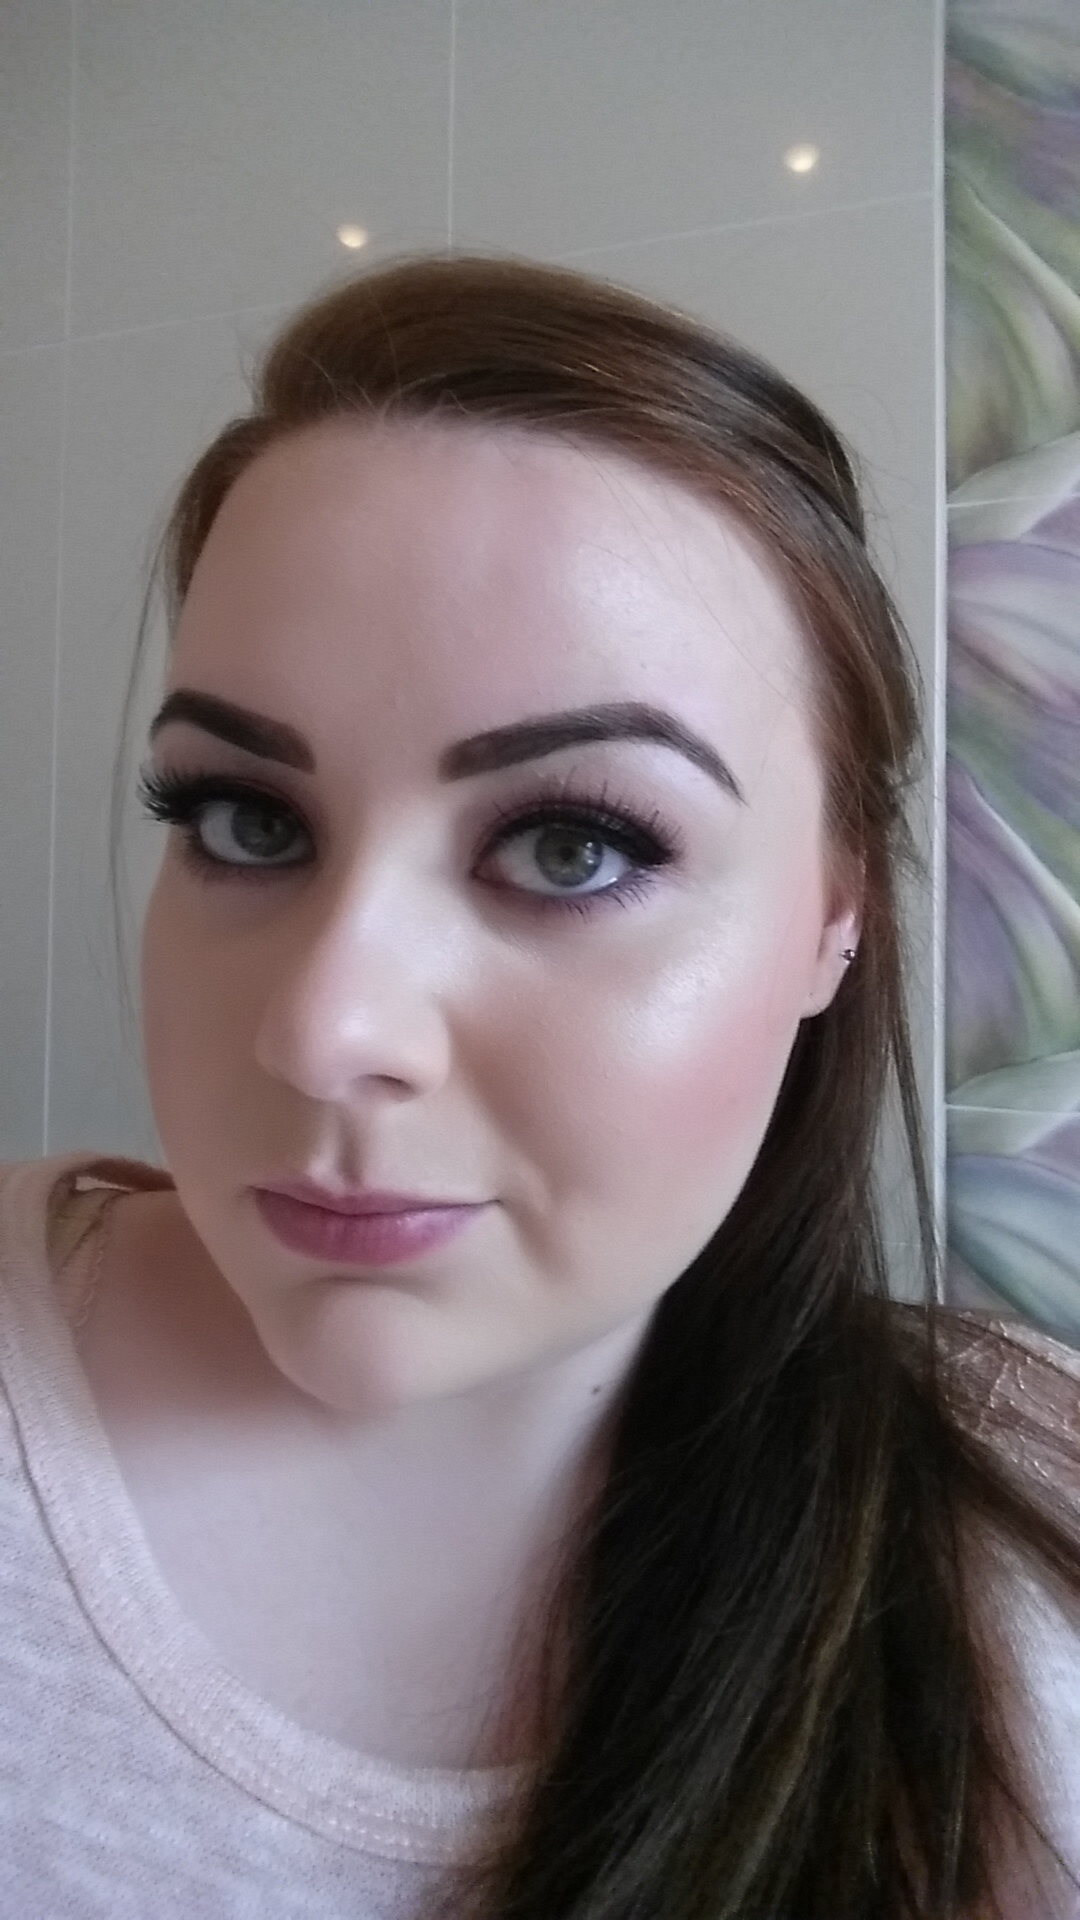
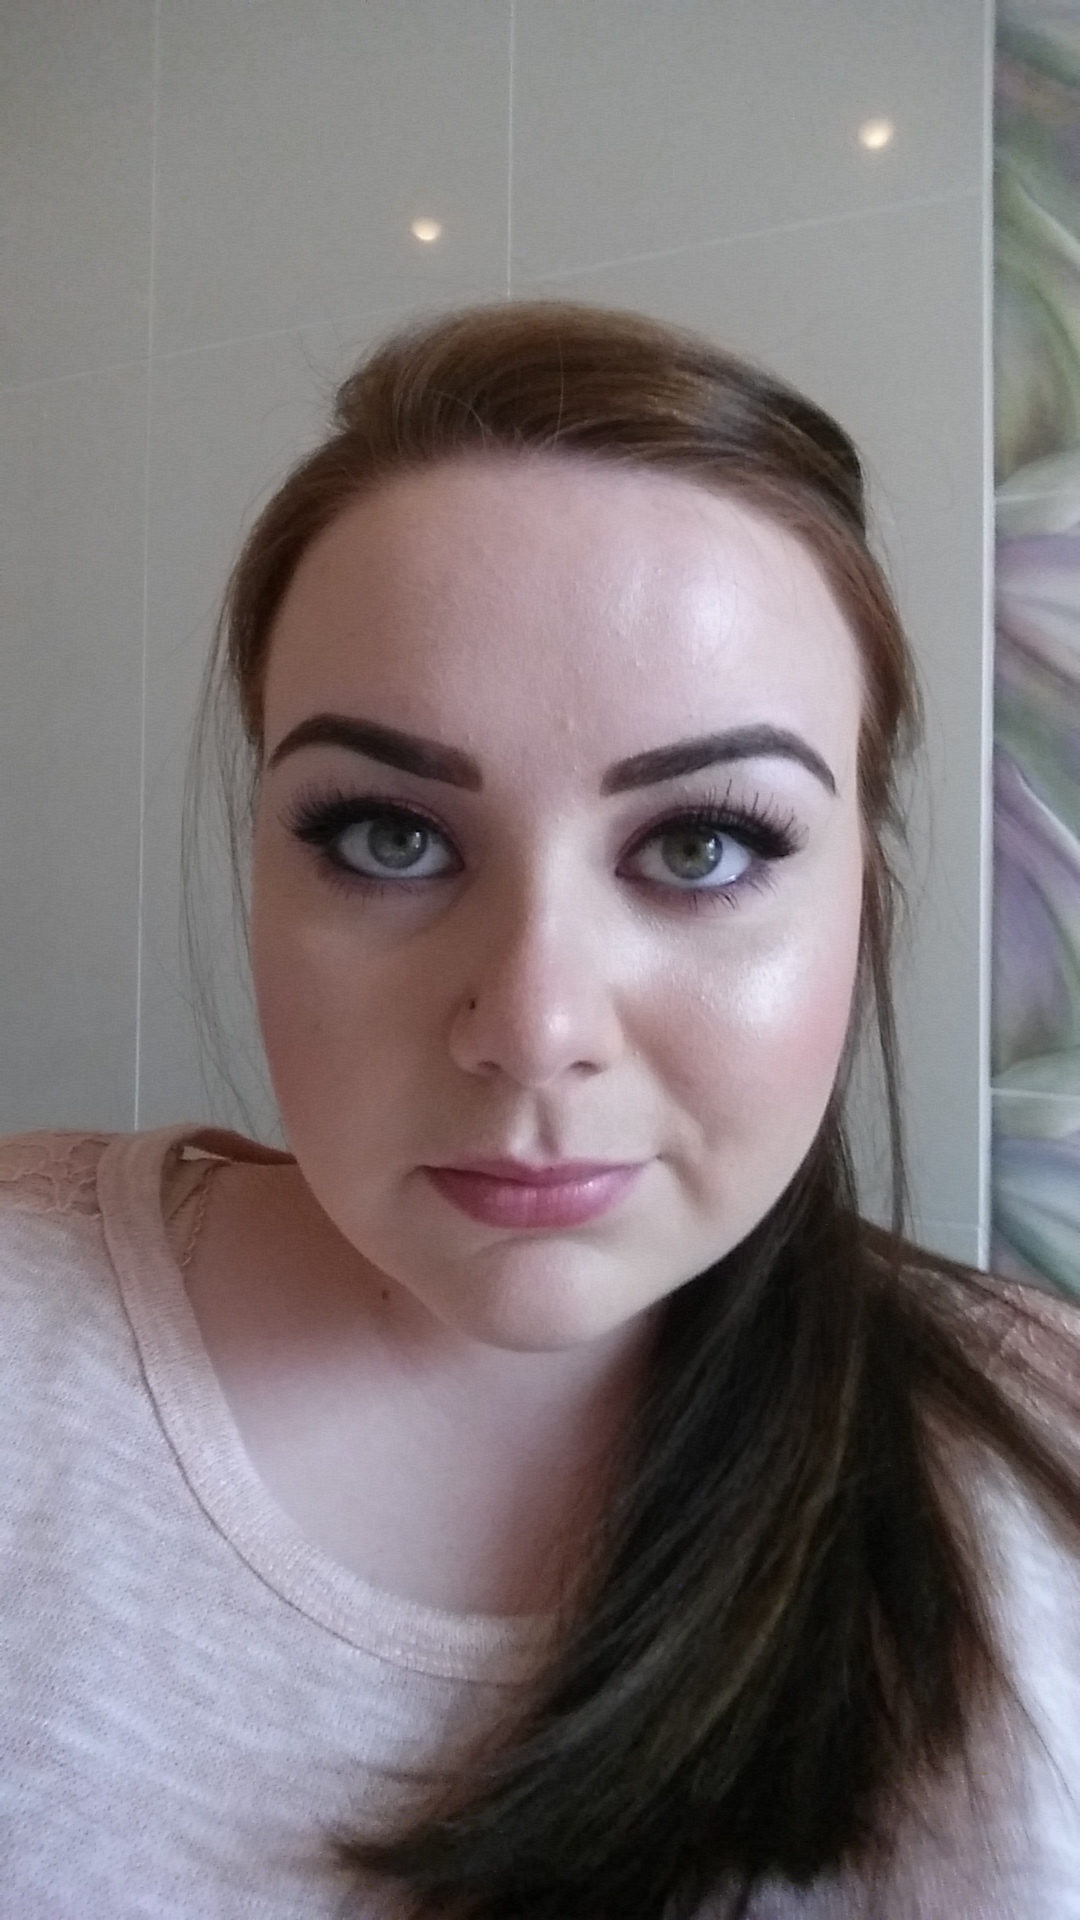
This week’s Look of The Week is a fabulous rose sparkle. It’s an intense look which will compliment blue eyes best but anyone can pull it off if you follow the tips. I am sorry it is a few days later than usual but right on time for a night out tonight! Hope you like it, it’s one of my favourites!

As always, start with a prepped and primed base. I have recently started using Charlotte Tilbury’s Wonder Glow Primer. This range is new to Ireland. but Charlotte Tilbury is one of the most famous makeup artists on the planet, so she really knows what she is doing. I have noticed a difference in my skin since started using this primer, I can’t fault it.
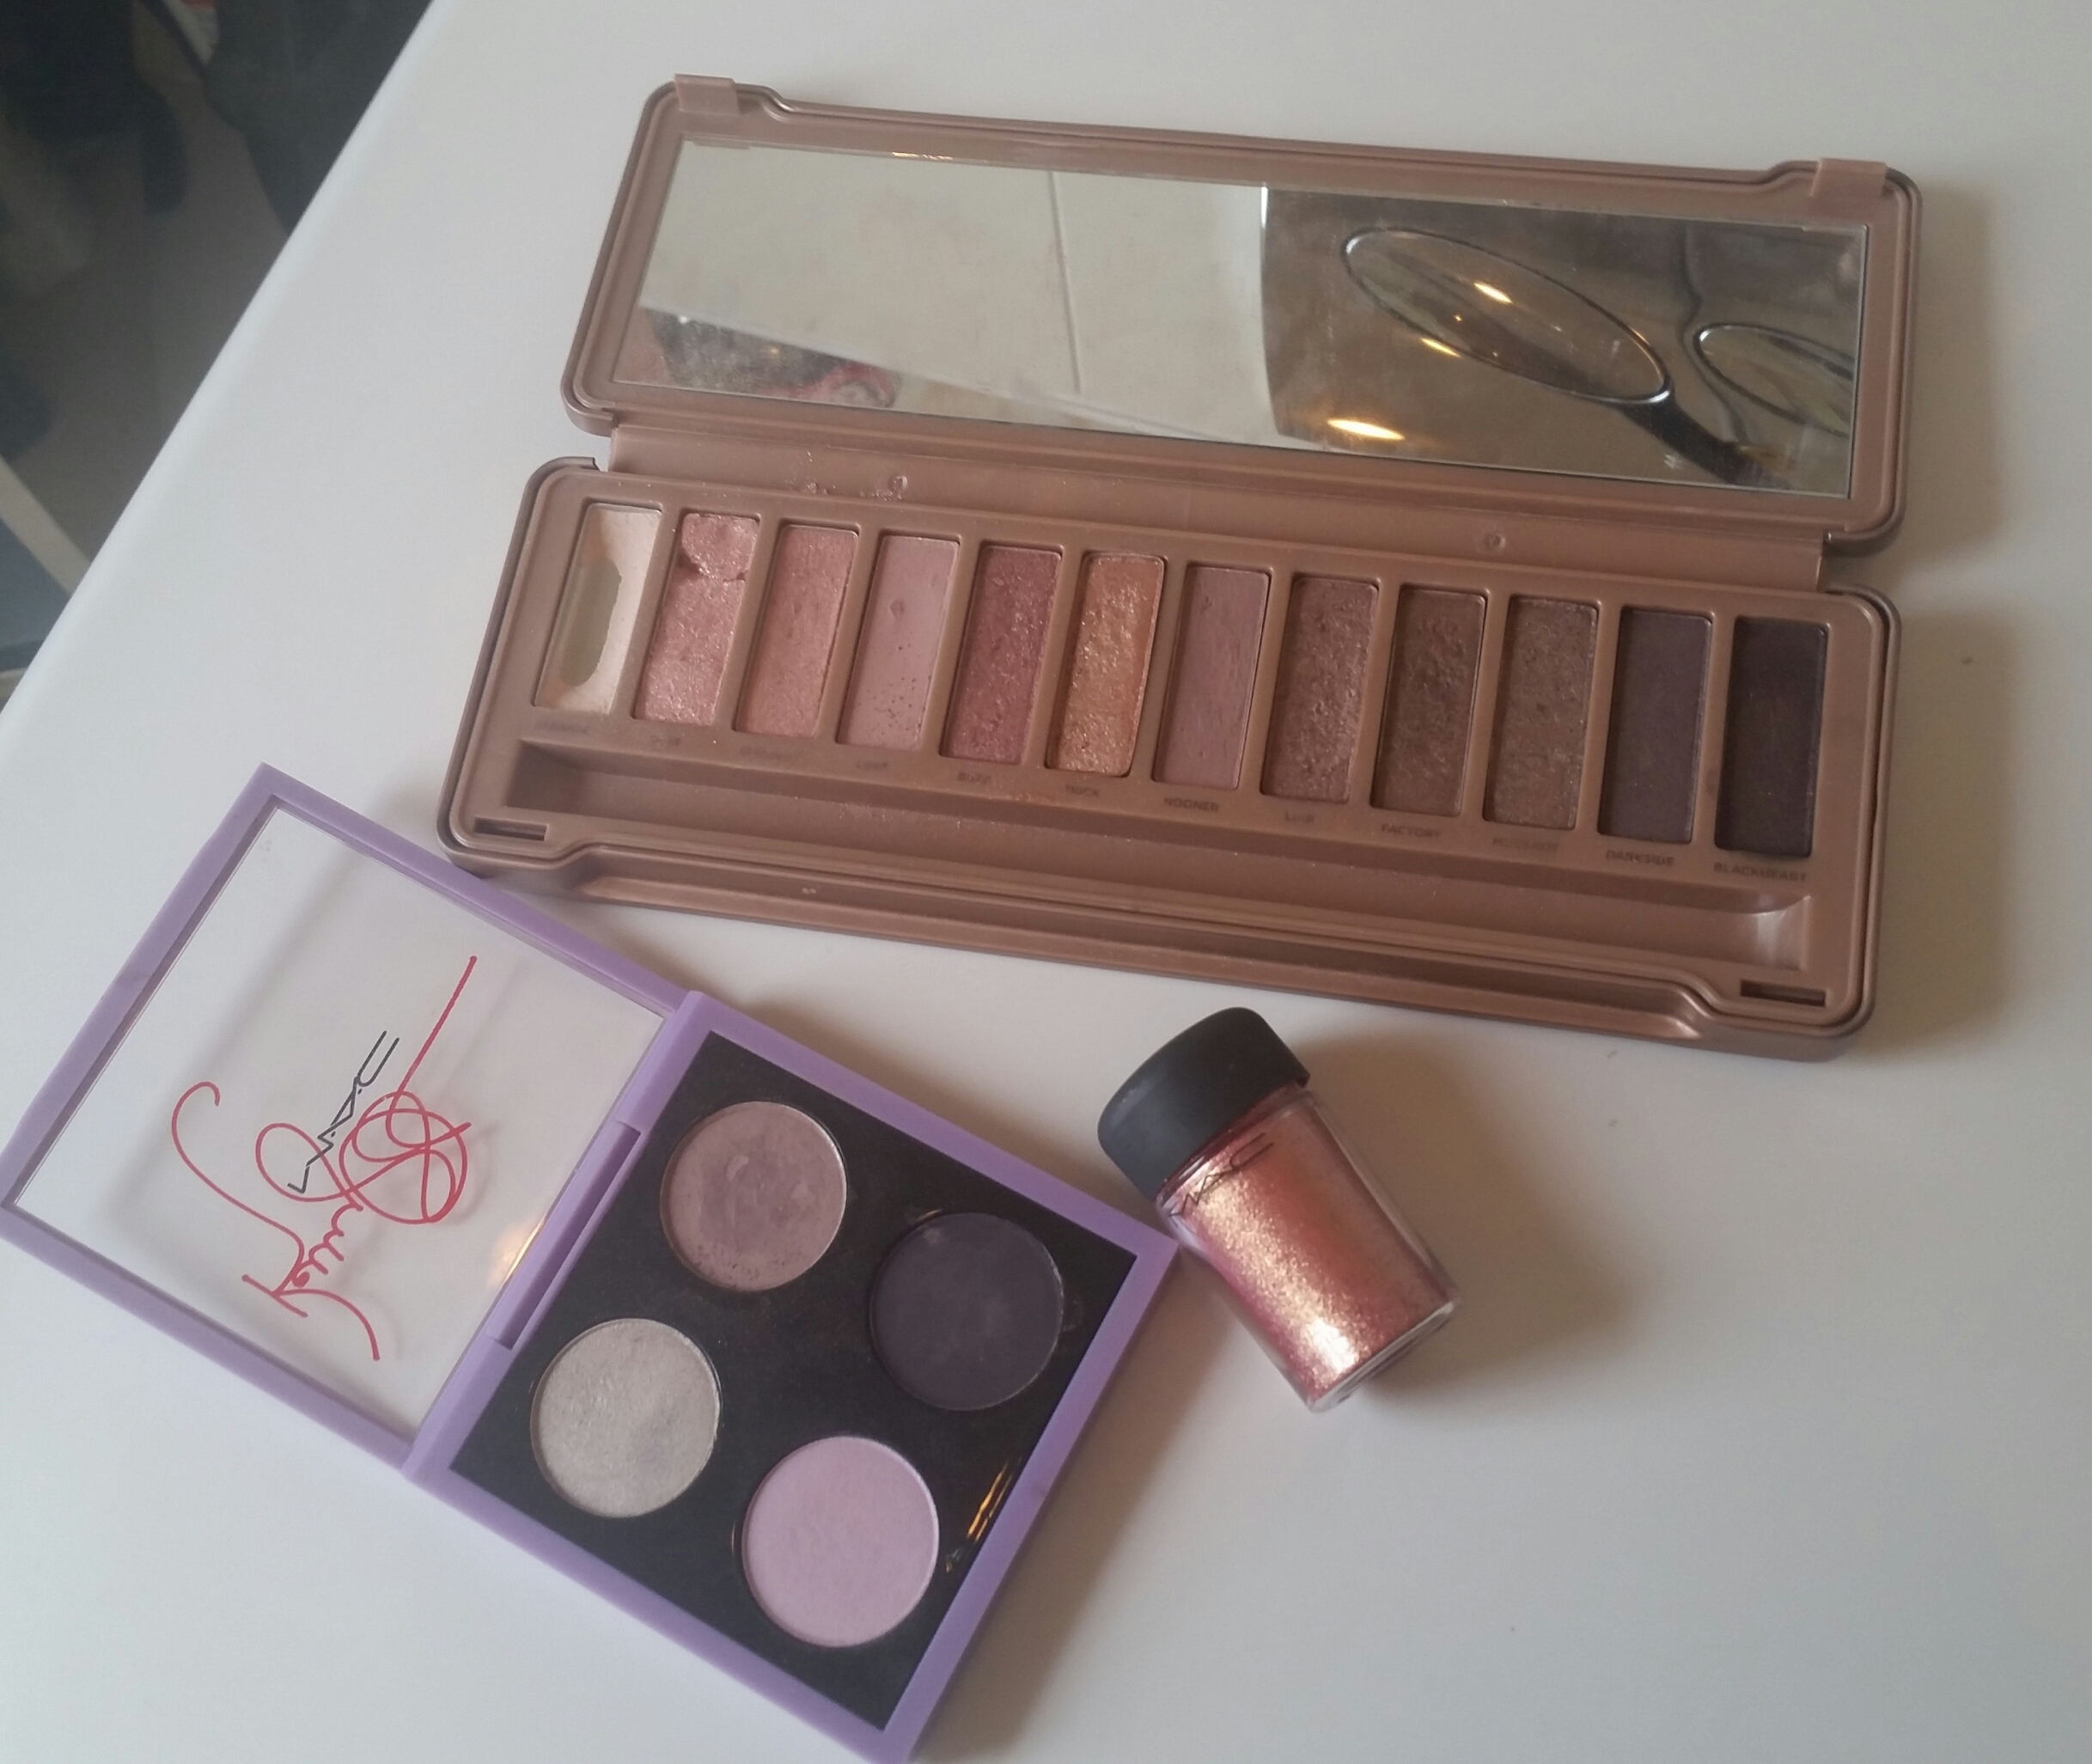
The rose colour I used on my lids needs a very good base so eye shadow primer is important. As per usual I applied concealer over my eye shadow primer too. I then took a base shadow, I used the one in Naked 3, and applied this from my crease to brow bone. Using a big blending brush I applied a transition shade. Starting in the crease, using windshield wiper motions blend this colour across the eyelid, working up, rather than down. I used Tickety Boo from the MAC Kelly Osbourne eye shadow quad. This doesn’t need to be too neat because it is more important to blend it out. I then took a deeper transition shade, I used Limit from Naked 3 and a more compacted brush, focussing more on the crease area, I applied this using windshield wiper motions again. Make sure you bring this right from the inner corner to the outer corner because you really want to add depth and dimension to set off the rose sparkle. Once I had created the level of depth I wanted in the crease, I moved on to the fun part!
MAC’s pigment pots are fantastic. They are pretty much loose shadow but the pigmentation is insane! They are messy and can be awkward to use but once you get the hang of them, the results you get are amazing. Rose is my absolute favourite shade, it is such a pretty colour with the most stunning shimmer in it. I use it by tapping some into the lid and using a dry brush I mix it together, then I wet my brush and pick up the product. Using a wet brush will keep the powder together. Tap the brush to remove excess product that you don’t want falling onto your cheek, then pat it onto the eyelid. I have been known to use my finger to apply this too as sometimes it’s just easier. I like to create a really intense look with this powder so I avoid blending it, instead I just pack it on to the lid. If you want a more washed out look sweep it on and it will be less intense. Applying this to the lid when you already have your crease completed can be awkward but just make sure you don’t go into your crease, keep it low, and when you are happy with the application, use the same brush you used to apply your transition shade and without adding anymore product blend the two colours together. I suggest with all looks you do this step between each eye shadow application to ensure there are no harsh lines.
The most important step with this look is eye liner. You want a very bold, thick liner. WIth any pink or orange shades the fear is you will just look like you’re ill. That’s the last thing you want, so by adding an intense liner you’re making a makeup statement. The black line also sets off the bright tones in the pink too. Have a look at my post on eye liner application for more tips.

When I have my lids done I move onto my foundation and concealer. Because of the consistency of the pigment powder you may need to clean up under your eyes with a cotton bud and some eye cream/moisturiser. This will also prime your under eye area for concealer and give it more protection. You want your eyes to look bright and fresh with this look so under eye concealer is important. I used my trusted MAC pro long wear in NC15. I then applied my foundation, I am wearing Estee Lauder Double Wear Light in o.5. This is an amazing foundation if you want lots of coverage. Then I set both my foundation and concealer with MAC’s mineralize skin finish in Light Plus, for my concealer I also used Smashbox’s Fusion Soft Lights, to add more brightness to the area.
With such intense eyes, I wanted a very subtle sculpted look for my face, I avoided highlighter everywhere but under my eyes. I used the MAC skin finish from Kelly Osbourne’s range to sculpt my cheek bones and my temples. Have a look at my post about highlighting and contouring for advice on this, just note I did a very subtle sculpting process for this look.
For my blusher I wanted a peachy colour that would compliment the pink tones on my eyes. Try to avoid pink blushers for this look because it may over power your eyes, you want your eyes to do the talking and your cheeks to compliment them. I used Smashbox’s Blush Rush Chiffon.
Once my face is completed I go back and finish my eyes. Taking my transition shade I generously line my lover lash line, don’t forget to blend, blend, blend (I’m sure I say that in every post!). I also used a black pencil to line my water line, this just makes the look appear to smokier.
I filled in my brows with Smashbox’s eyebrow crayon in brunette. I got my brows done yesterday so they are darker than usual.
Last but not least I applied Eyelure’s new Exaggerate lashes, I haven’t worn them much so the verdict is still out, but have a look at my lash application post for help with putting them on. A coat of YSL’s Baby Doll Mascara helps blend the falsies with my natural lashes.
And we’re done. Like I said, I love this look, it’s just so pretty and fun. My last piece of advice is to wear neutral clothes with this look. You don’t want too much colour going on, so keep it simple. Hope you enjoy!
Product List
- Foundation: Estee Lauder – Double Wear Light in 0.5
- Concealer: MAC – Pro long wear in NC15
- Setting Powder: MAC – Skin Finish in Light Plus
- Highlighter: Smashbox – Fusion Soft Lights
- Contour: MAC – Kelly Osbourne Skin finish
- Blusher: Smashbox – Blush Rush Chiffon
- Palettes: Urban Decay – Naked 3. MAC – Kelly Osbourne Quad
- Shadow: MAC – Pigment pot in Rose
- Liner: Gel – RImmel 001Black. Pencil – Smashbox Kohl
- Mascara: YSL – Volume Effet Faux Cils – Black
- Brows: Smashbox – Brunette Crayon
- Lashes: Eyelure – Exaggerate

Hello

